This website uses cookies to allow us to see how the site is used. If you continue to use this site, we assume that you are okay with this. If you want to use the sites without cookies, please see our privacy policy.

Action hook after opening body tag

Before WordPress 5.2.0 it was always a hassle to add anything just after the opening HTML body tag in your theme. For the release of 5.2.0 came the action hook “wp_body_open”. This was added to core and of course, your theme or any themes for this release need to be compatible with core but we’ll come to that bit later, first let’s look at what can be done with the action hook.

// Add your code after opening body tag.
add_action( 'wp_body_open', 'wpstx_add_after_opening_body_tag' );
function wpstx_add_after_opening_body_tag() {
    echo '<!-- added your code here en -->';
}

For backward compatibility you should add this to your theme immediately after your opening body tag. If you are using a premium theme ask the theme developer to add this if it doesn’t already exist

<?php
if ( function_exists( 'wp_body_open' ) ) {
    wp_body_open();
}
?>

@source https://developer.wordpress.org/reference/functions/wp_body_open/

1

Use a custom post type to send notifications as Html emails to users by the user role

When I set WP Snippets til Christmas up this year I wanted to send an email to all the previous contributors just to notify them this was going to be a thing again for 2019.

As the previous contributors were already registered users and rather than subscribe to a third-party service I wanted to see how I could do this with WordPress core, can’t be that difficult right? So with a little bit of thought and rough testing, I started to formulate a plan.

I needed to think about all the pitfalls and what I wanted to do. First of all, I needed a custom post type but, how was I going to trigger the send? I couldn’t do it on the save_post action hook otherwise the post would get emailed every time it was updated. I would also need to be careful about sending on the save_post with multiple users too, waiting for a post to save after trying to send 300 users an email could take forever! How could I stagger the sending to avoid getting blocked or banned by the server? Would I need to set some post meta on the post as a ‘sent email notification’ marker just so I didn’t send it again? Perhaps I could use the WP Cron to schedule an event to check all Published posts that hadn’t been already been sent by email…

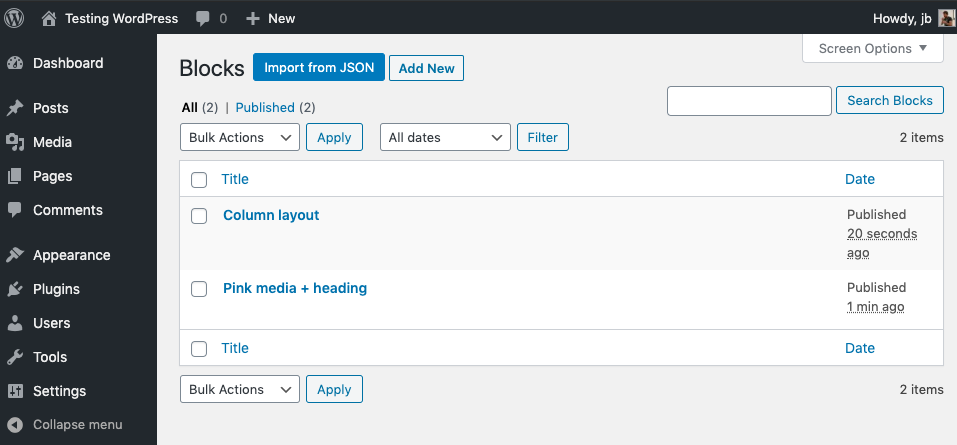
…so with all this in mind, I ended up doing it like so, first all I needed a custom post type but take it out of public visibility.

/**
 * Register a custom post type to handle all the emails notifications.
 * The labels and arguments here might be overkill but I used https://generatewp.com/post-type/
 * to generate the code so you get what is generated.
 * 
 * @source GenerateWP https://generatewp.com/post-type/
 * 
 */
function email_notification() {

	$labels = array(
		'name'                  => _x( 'Emails', 'Post Type General Name', 'wpstx-email-notification-with-post-type' ),
		'singular_name'         => _x( 'Email', 'Post Type Singular Name', 'wpstx-email-notification-with-post-type' ),
		'menu_name'             => __( 'Email Users', 'wpstx-email-notification-with-post-type' ),
		'name_admin_bar'        => __( 'Email', 'wpstx-email-notification-with-post-type' ),
		'archives'              => __( 'Item Archives', 'wpstx-email-notification-with-post-type' ),
		'attributes'            => __( 'Item Attributes', 'wpstx-email-notification-with-post-type' ),
		'parent_item_colon'     => __( 'Parent Item:', 'wpstx-email-notification-with-post-type' ),
		'all_items'             => __( 'All Items', 'wpstx-email-notification-with-post-type' ),
		'add_new_item'          => __( 'Add New Item', 'wpstx-email-notification-with-post-type' ),
		'add_new'               => __( 'Add New', 'wpstx-email-notification-with-post-type' ),
		'new_item'              => __( 'New Item', 'wpstx-email-notification-with-post-type' ),
		'edit_item'             => __( 'Edit Item', 'wpstx-email-notification-with-post-type' ),
		'update_item'           => __( 'Update Item', 'wpstx-email-notification-with-post-type' ),
		'view_item'             => __( 'View Item', 'wpstx-email-notification-with-post-type' ),
		'view_items'            => __( 'View Items', 'wpstx-email-notification-with-post-type' ),
		'search_items'          => __( 'Search Item', 'wpstx-email-notification-with-post-type' ),
		'not_found'             => __( 'Not found', 'wpstx-email-notification-with-post-type' ),
		'not_found_in_trash'    => __( 'Not found in Trash', 'wpstx-email-notification-with-post-type' ),
		'featured_image'        => __( 'Featured Image', 'wpstx-email-notification-with-post-type' ),
		'set_featured_image'    => __( 'Set featured image', 'wpstx-email-notification-with-post-type' ),
		'remove_featured_image' => __( 'Remove featured image', 'wpstx-email-notification-with-post-type' ),
		'use_featured_image'    => __( 'Use as featured image', 'wpstx-email-notification-with-post-type' ),
		'insert_into_item'      => __( 'Insert into item', 'wpstx-email-notification-with-post-type' ),
		'uploaded_to_this_item' => __( 'Uploaded to this item', 'wpstx-email-notification-with-post-type' ),
		'items_list'            => __( 'Items list', 'wpstx-email-notification-with-post-type' ),
		'items_list_navigation' => __( 'Items list navigation', 'wpstx-email-notification-with-post-type' ),
		'filter_items_list'     => __( 'Filter items list', 'wpstx-email-notification-with-post-type' ),
	);
	$args = array(
		'label'                 => __( 'Email', 'wpstx-email-notification-with-post-type' ),
		'description'           => __( 'Email notification system', 'wpstx-email-notification-with-post-type' ),
		'labels'                => $labels,
		'supports'              => array( 'title', 'editor' ),
		'hierarchical'          => false,
		'public'                => false,
		'show_ui'               => true,
		'show_in_menu'          => true,
		'menu_position'         => 25,
		'menu_icon'             => 'dashicons-email',
		'show_in_admin_bar'     => true,
		'show_in_nav_menus'     => false,
		'can_export'            => false,
		'has_archive'           => false,
		'exclude_from_search'   => true,
		'publicly_queryable'    => false,
		'capability_type'       => 'email_notification', // our own cap type
		'map_meta_cap'        	=> true,
		'capability'			=> array(
			'publish_posts'     => 'manage_email_notifications', // the capability to add to the role
		)
	);
	register_post_type( 'email_notification', $args );

}
add_action( 'init', 'email_notification' );

Add the capabilities to the Administrator so only admin can use this functionality, other roles can be added but to keep things simple we are only interested in Administrators for now.

/**
 * Add the capabilities to use this email system to the administrator only
 */
function wpstx_add_role_caps() {

	// The roles to manage this custom post type, other roles can been added to this array but we are only allowing this for Administrators
	$roles = array('administrator');
	
	// Loop through each role as it's an array and assign capabilities
	foreach($roles as $the_role) { 
		$role = get_role($the_role);
		$role->add_cap( 'read' );
		$role->add_cap( 'manage_email_notifications' );
		$role->add_cap( 'read_email_notification');
		$role->add_cap( 'read_private_email_notifications' );
		$role->add_cap( 'edit_email_notification' );
		$role->add_cap( 'edit_email_notifications' );
		$role->add_cap( 'edit_others_email_notifications' );
		$role->add_cap( 'edit_published_email_notifications' );
		$role->add_cap( 'publish_email_notifications' );
		$role->add_cap( 'delete_others_email_notifications' );
		$role->add_cap( 'delete_private_email_notifications' );
		$role->add_cap( 'delete_published_email_notifications' );

	}
}
add_action('admin_init','wpstx_add_role_caps');

Just for some additional and obvious user feedback, I wanted to change the “Publish” button to “Send” so here’s a very simple, fairly seasoned filter hook to do just that and only on my custom post type

/**
 * Change the button that says "Publish" to "Send" on the post type
 * "email_notifications" to make the UI look more obvious that the
 * user is about to send something.
 * 
 * @source https://developer.wordpress.org/reference/hooks/gettext/
 * 
 * @param 	string 	$translation 	Translated text
 * @param 	string 	$text 	Text to translate
 * @param 	string 	$domain 	Textdomain
 * @return 	string 	$translation 	Translated text
 * 
 */
function wpstx_change_publish_to_send( $translation, $text, $domain ) {
	if ( 'email_notification' == get_post_type() && ($text == 'Publish') ) {
		$translation = 'Send';
	}
	return $translation;
}
add_filter( 'gettext', 'wpstx_change_publish_to_send', 10, 3 );

I then needed to somehow save some post meta to the post that I could use later to find only published posts that hadn’t previously been sent, this can be done on the post_status auto-draft which is initiated as soon as a new post is created, I’ve also added a few other checks to stop the running of the function if its not needed.

/**
 * Save some post meta with the email_notification post type
 * on auto-draft or when the post if first initiated
 * 
 * @source https://developer.wordpress.org/reference/hooks/save_post/
 * 
 * @param 	int 		$post_id 	Auto generated post ID
 * @param 	object 		$post 		WP post object
 * @param 	boolean 	$update 	Whether this is an existing post being updated or not
 */
function wpstx_save_notification_status( $post_id, $post, $update = false ) {

	if ( ! current_user_can( 'edit_post', $post_id ) || $update) {
        return; // stop if the current user does not have capabilities to edit this or post is an update 
	}
	if ( defined( 'DOING_AUTOSAVE' ) && DOING_AUTOSAVE ) {
        return; // stop if the current post is auto saving
    }
	if( $post->post_type === 'email_notification' || $post->post_status === 'auto-draft' ) {
		add_post_meta($post_id, 'notification_sent', '0'); // add post meta that we will use in the wp cron later
	}

}
add_action( 'save_post', 'wpstx_save_notification_status', 10, 3 );

I also wanted to set the role for the email so that I could effectively segment different emails to different roles, for this I needed to add a custom meta box. This would require a function to add the meta box, a callback function renders the meta box and another function to save the post meta for that meta box, here’s all the code for just for that.

/**
 * Register some custom meta to select user role to email to.
 * 
 * @source https://developer.wordpress.org/reference/hooks/add_meta_boxes/
 */
function wpstx_register_meta_boxes() {
    add_meta_box( 'user-role', __( 'Role to Email', 'wpstx-email-notification-with-post-type' ), 'wpstx_my_display_callback', 'email_notification' );
}
add_action( 'add_meta_boxes', 'wpstx_register_meta_boxes' );

/**
 * Render the meta box to display in the backend.
 * We are also getting all the current WordPress roles with the global $wp_roles
 * here so we can isolate what role to set the email notification to send to
 *
 * @param	object	$post	Current post object.
 */
function wpstx_my_display_callback( $post ) {
	global $wp_roles;
	$roles = $wp_roles->roles;

	// for security when saving the data later
	wp_nonce_field( 'role_to_email', 'role_to_email_nonce' ); 
	// get the current value to check against
	$role_to_email = get_post_meta( $post->ID, '_role_to_email', true ); 

	?>
	<!-- set a label with translation just because it's good practice -->
	<label for='role_to_email'>
		<?php _e( 'Select the user role to email', 'wpstx-email-notification-with-post-type' ); ?>
	</label>
	<!-- add the name key '_role_to_email' for indexing the meta -->
	<select name='_role_to_email'>
		<!-- set a default of selected but disabled on render if the an option hasn't already been selected -->
		<option value='' selected disabled>Select Role</option>
		<?php foreach($roles as $k => $role) { ?>
			<!-- the currently selected option using the wp core function "selected" https://developer.wordpress.org/reference/functions/selected/ -->
			<option value='<?php echo esc_attr($k); ?>' <?php selected( $role_to_email, $k, true ); ?>><?php echo esc_attr($role['name']); ?></option>
		<?php } ?>

	</select>

	<?php
}


/**
 * Save meta box content.
 *
 * @param 	int 	$post_id 	Post ID
 * 
 * @source https://developer.wordpress.org/reference/hooks/save_post/
 */
function wpstx_save_meta_box( $post_id ) {
	if ( ! isset( $_POST['role_to_email_nonce'] ) ) {
        return; // stop if the nounce is not set
    }
    if ( ! wp_verify_nonce( $_POST['role_to_email_nonce'], 'role_to_email' ) ) {
        return; // stop if the nounce doesn't varify
    }
    if ( defined( 'DOING_AUTOSAVE' ) && DOING_AUTOSAVE ) {
        return; // stop if auto saving the post
    }
    if ( ! current_user_can( 'edit_post', $post_id ) ) {
        return; // stop if the current user does not have capabilities to edit this or post
    }
    if ( isset( $_POST['post_type'] ) && 'email_notification' === $_POST['post_type'] ) {
		// only happens if the post type is "email_notification" 
		if(isset($_POST['_role_to_email'])) {
			// only happens if name key is set
			update_post_meta($post_id, '_role_to_email', esc_attr($_POST['_role_to_email']));
		}
    }
}
add_action( 'save_post', 'wpstx_save_meta_box', 10, 1 );

In the above code, a role is set so, I needed a helper function to get all the users for a particular role that will be needed during the sending of the email later in a WP Cron event, this function returns all the users from a particular role if the role is set.

/**
 * A simple helper function to get all users by role if the parameter is set
 * 
 * @param	string/array	$roles	Key for role set in WordPress roles
 */
function wpstx_get_users($roles = '') {
    $args = array();
    if($roles) {
        $args['role'] = $roles;
    }
    $users = get_users($args);
    return $users;
}

So next up comes the WP Cron event itself which is a fair chunk of code. I’ve heavily commented on it line by line to describe what is going on.

It describes what happens after an email notification is set to “Publish” or when “Send” is clicked in the UI for the email notification.

The next custom WP Cron event will get all published posts that do not have a custom meta “notification_sent” equal to “1” then look for all users of a particular role, then set up the email from the post content as a HTML email, send the email, wait 10 seconds and continue to the next user to send another email.

/**
 * This function takes care of all the sending of emails that
 * are hooked to our custom action hook scheduled by the wp cron
 */
function wpstx_send_emails() {

	// get all the posts that are set to published and that
	// do not have a meta key 'notification_sent' set to '1'
	// we will set this to '1' after the email notification is sent
	// this will ensure that we don't send it again
	// https://developer.wordpress.org/reference/functions/get_posts/
	$emails = get_posts(
		array(
			'post_type' => 'email_notification',
			'post_status' => 'publish',
			'meta_key' => 'notification_sent',
			'meta_value' => '1',
			'meta_compare' => '!='
		)
	);

	// $emails will return and array of objects so we'll use a
	// foreach to loop the email notifications ready to send
	foreach ($emails as $send_email) {

		// get role set for sending the email notification 
		$role = get_post_meta($send_email->ID, '_role_to_email', true);
		// if $role is set pass it to helper function 'wpstx_get_users()'
		if(isset($role) && $role != '') {
			$users = wpstx_get_users($role);
		} else {
			$users = wpstx_get_users();
		}

		// now we have all the users to send an email notification to
		// and we can use the $send_email post object to setup some parameters
		foreach ($users as $user) {

			// get the post title by ID and set the subject line for the email
			// https://developer.wordpress.org/reference/functions/get_the_title/
			$subject = get_the_title( $send_email->ID );
			// we only need the post_content of the post and we will filter it using the_content
			// https://developer.wordpress.org/reference/functions/get_post_field/
			// https://developer.wordpress.org/reference/hooks/the_content/
			$content = apply_filters('the_content', get_post_field('post_content', $send_email->ID));
			// load the $message variable with a personalised "Hey username" 
			$message = '<p>Hey ' . $user->user_login . '</p>';
			// concatinate the $content to the end of the "Hey..." $message variable
			$message .= $content;
			// as we are sending html we need to set an email header as an array
			$headers = array('Content-Type: text/html; charset=UTF-8');
			// Send the email to the user with the subject, message and headers.
			// https://developer.wordpress.org/reference/functions/wp_mail/
			wp_mail($user->user_email, $subject, $message, $headers);
			// IMPORTANT!!
			// Your host will have a limit on the amount of eamils you can send per minute/hour from your
			// server so it is super important to set a delay between each emails sent, otherwise
			// you could get your hosting account temporarily blocked on banded for spammy looking activity.
			// I'm simpy using a 10 second delay between each sending of an email, you might need to increase
			// this depending on the amount of users you have to send to
			sleep(10);

		}

		// Once the email has been sent now set the post with a post meta
		// key 'notification_sent' equal to '1' this will ensure we never
		// pick it up as published post to send again as set in the
		// WordPress function get_posts() above.
		update_post_meta($send_email->ID, 'notification_sent', '1');

	}

}
add_action( 'wpstx_check_scheduled_emails', 'wpstx_send_emails' );

/**
 * This sets the next event time for our action hook
 * "wpstx_check_scheduled_emails" that fires "wpstx_send_emails"
 */
wp_next_scheduled( 'wpstx_check_scheduled_emails' );

/**
 * This checks if the event is set or past and sets a new one if it has past
 * or at least that's the way I interpret the way it works :)
 */
if ( ! wp_next_scheduled( 'wpstx_check_scheduled_emails' ) ) {
	// now we can tap in to the WordPress cron schedule, there is a choice of
	// ‘hourly’, ‘twicedaily’, and ‘daily’
	// you can set your own custom time intervals as well 
	// https://developer.wordpress.org/plugins/cron/understanding-wp-cron-scheduling/
	// in this case we are firing the custom action hook "wpstx_check_scheduled_emails"
	// on the next hourly interval
    wp_schedule_event( time(), 'hourly', 'wpstx_check_scheduled_emails' );
}

The benefit of doing it this way free’s up the backend processing time and user’s interaction by pushing all the heavy work to a background cron event, you don’t have to click a button and wait for the process to finish which could be a while, for instance, if you had 1000 users with a 10 second delay between sending each email 🙂

And here is a final job to remove the schedule, this is just good practice if it is a plugin for instance and you wanted to remove the event after deactivation of the plugin.

/**
 * Setup a deactivation hook to remove this cron if this plugin is disabled
 * 
 * @source https://developer.wordpress.org/reference/functions/register_deactivation_hook/
 */
function wpstx_deactivate_email_notification_cron() {
	// retrieve the event
	$timestamp = wp_next_scheduled( 'wpstx_check_scheduled_emails' );
	// unset the event
	wp_unschedule_event( $timestamp, 'wpstx_check_scheduled_emails' );
}
register_deactivation_hook( __FILE__, 'wpstx_deactivate_email_notification_cron' );

That’s how I set up a custom post type as an Email Notification system using the WP Cron.

@github https://github.com/eirichmond/wpstx-email-notification-with-post-type

3

How to Disable All Unwanted Image Sizes

This year, give your site the gift that keeps on giving: better optimized image handling. As of version 5.3, WordPress automatically generates seven (7!) additional images for every image that you upload via the WP Media Library (and/or RTE/Visual editor). So in addition to the original image on the server, WordPress generates images with the following dimensions:

Continue reading “How to Disable All Unwanted Image Sizes”

4

Restricting Access to the WordPress Dashboard By User Role

I see this a lot with people using the WP User Manager plugin to turn their WordPress site into a community or membership site. Users register for the site from the front end form, they are given a certain role (eg. subscriber), they then can manage their own profile from the front end of the site, but then also have access to the WordPress dashboard (via /wp-admin).

This isn’t the best experience for users who shouldn’t be seeing any form of wp-admin (even if they can’t do much in it). Here’s how you can lock down the dashboard to only administrators:

/**
 * Only allow access to the wp-admin dashboard for users with the manage_options capability (administrators).
 * Customize the capability as needed https://wordpress.org/support/article/roles-and-capabilities/
 */
function wpum_restrict_wp_admin_access() {
	if ( defined( 'DOING_AJAX' ) && DOING_AJAX ) {
		// Don't hijack AJAX requests
		return;
	}

	if ( ! is_admin() ) {
		// We aren't in the admin
		return;
	}

	if ( current_user_can( 'manage_options' ) ) {
		// User has the correct role
		return;
	}

	// Redirect to the homepage. Customize as needed
	wp_safe_redirect( home_url() );
	exit;
}

add_action( 'init', 'wpum_restrict_wp_admin_access' );

The admin bar will still appear for users on the front end of the site, which WP User Manager has a setting to disable it, but you can do this manually with the following:

/**
 * Only show the wp-admin bar for users with the manage_options capability (administrators).
 * Customize the capability as needed https://wordpress.org/support/article/roles-and-capabilities/
 *
 * @param bool $show_admin_bar
 *
 * @return bool
 */
function wpum_hide_admin_bar( $show_admin_bar ) {
	if ( ! current_user_can( 'manage_options' ) ) {
		return false;
	}

	return $show_admin_bar;
}

add_filter( 'show_admin_bar', 'wpum_hide_admin_bar' );
5

Get Gutenberg reusable blocks outside the Block Editor

Did you know that Gutenberg Reusable Blocks are stored as a bundled Post Type in WordPress database? Yep they are. You can even access them on the Reusable Blocks hidden admin screen available in example.com/wp-admin/edit.php?post_type=wp_block.

Caption: Reusable Blocks admin screen

If Reusable Blocks are registered as a post type, then they are queryable as well as any post type in WordPress.

So we could easily get them outside of the editor…

Yeah! Looks great, let’s build some cool stuff!

Introducing get_reusable_block PHP function

This function will only get the formatted HTML content of a given Reusable block ID and return it.

Note: I’m prefixing the function with advent_ for the sake of WordPress Coding Standards ?

function advent_get_reusable_block( $block_id = '' ) {
	if ( empty( $block_id ) || (int) $block_id !== $block_id ) {
		return;
	}
	$content = get_post_field( 'post_content', $block_id );
	return apply_filters( 'the_content', $content );
}

So we can easily get any reusable block content by providing its ID. The following snippet will use get_reusable_block() function to display this block outside the editor (in your footer for example):

echo advent_get_reusable_block( 57 );

Example of advanced use: build a Reusable block shortcode

It’s quite easy to build a custom shortcode using our previous get_reusable_block function:

function advent_reusable_block_shortcode( $atts ) {
	extract( shortcode_atts( array(
		'id' => '',
	), $atts ) );
	if ( empty( $id ) || (int) $id !== $id ) {
		return;
	}
	$content = advent_get_reusable_block( $id );
	return $content;
}
add_shortcode( 'reusable', 'advent_reusable_block_shortcode' );

We now have a brand new shortcode, which can be easily used to display reusable block even in places where the block editor is not available!

[reusable id="57"]

Use cases for this shortcode are various:

  • Custom Post Types without Block Editor enabled (so they are in Classic Editor mode)
  • Text Widget (so reusable blocks can be added in your footer or in your sidebar)
  • Advanced Custom Field (ACF) WYSIWYG editor field
  • Gravity form confirmation message (the message that is displayed to users after filling the form)
  • And even on… websites with Classic Editor plugin! So you can use Gutenberg Reusable Blocks without having it in any of your Custom Post Types, lol ?

Here is a plugin that is using this snippet. It also provide a Reusable Block Widget and in provides an extended admin interface to manage and preview reusable blocks:

Merry Christmas, lovely WordPress people! ?

6

Automatically Add Child Pages to Menus

To create a menu in WordPress, you have to create your pages, and then hop over to Appearance->Menus to set up your menu hierarchy. I’ve always wondered why menus are not intrinsically tied to page hierarchies. There is a ‘Parent Page’ setting on the Page Edit screen, so why not use it for your menu hierarchy? If the parent page is in your menu, child pages could be automatically added to the menu. Doing so has the added bonus of setting your hierarchy for things like Yoast breadcrumbs and menus in the same place so they always match, and changes don’t need to be made in two places.

To automatically add child pages to a menu, we can use the filter hook: nav_menu_item_args. The filter is called for each top level page added to the menu you are displaying with WordPress’ wp_nav_menu() function. We’ll check each top level page to see if it has children, get the children with wp_list_pages(), and add them to the unordered list.

if ( ! function_exists( 'aacpm_add_sub_pages_toggles_to_main_menu' ) ) {
    function aacpm_add_sub_pages_toggles_to_main_menu( $args, $item, $depth ) {
        
        //You could check the $args->theme_location to determine if child pages should be automatically added to this menu or not.
        // if ( $args->theme_location == 'primary' ) {
            $children = null;
            
            $args2 = array('depth'   => 1, //only 1 level of children
                'child_of'           => $item->object_id, // Note $object->ID is menu id and not post id
                'echo'               => 0,
                'title_li'           => '',
                'sort_column' => 'menu_order' //you'll need https://wordpress.org/plugins/simple-page-ordering/ to order your child pages
            );
            $children = wp_list_pages($args2);                            

            if ( $children ) {
                //You might want to add additional markup to your menus to add things like toggles to open/close submenus, etc. Add with $args->before or $args->after                

                //Child pages are added to the menu with this line
                $args->after = '<ul class="sub-menu">' . $children . '</ul>';
            }  
        //} // end theme_location check
        return $args;
    }

    //add function to the nav_menu_item_args filter
    add_filter( 'nav_menu_item_args', 'aacpm_add_sub_pages_toggles_to_main_menu', 999, 3 );

}

In the wp_list_pages() $args2, I used ‘sort_column’ => ‘menu_order’. To set the menu_order, you’ll need a plugin. I use the ‘Simple Page Ordering’ plugin: https://wordpress.org/plugins/simple-page-ordering/ The ‘Simple Page Ordering’ plugin adds the ability to reorder your pages by drag and drop in the Admin Pages List (/wp-admin/edit.php?post_type=page). Now your editors can set the menu hierarchy and order sub pages without hopping over to Appearance -> Menus.

Using the code above, the CSS classes on the child list items are different from the default Appearance-> Menus submenu classes. For example, active child menus get the class ‘current_page_item’ only instead of both ‘current-menu-item current_page_item’. You might need to edit your CSS to highlight active child pages in the menu.

If you want to add a class to the parent list item to match the ‘menu-item-has-children’ class added with the default Appearance->Menus, hook into the nav_menu_css_class filter:

if ( ! function_exists( 'aacpm_add_parent_class_to_menu' ) ) {

    function aacpm_add_parent_class_to_menu($classes, $item, $args, $depth){
        if($depth != 1 ){ //if depth == 1 don't display child pages
            $children = get_pages( array( 'child_of' => $item->object_id ) );
            if($children){
                $classes[] = 'menu-item-has-children';
            }
        }
        return $classes;
    }

    add_filter( 'nav_menu_css_class', 'aacpm_add_parent_class_to_menu', 999, 4);
}

You can add this code to your functions.php or create a plugin. I put together a small plugin you can download here. The plugin also adds the ability for Editors to access the Appearance menu ( edit_theme_options ) so they can change/reorder the top level menu pages, edit widgets, and change theme settings. Changing menus and editing widget content are things I usually want Editors to be able to do, but I don’t want to give them Administrator access to change/add plugins or site settings.

With this code, your Editors only need to set the top level pages in their Menu. Child pages (pages with a ‘Parent Page’ set to a top level page in the Menu) will automatically be added to their menus.

7

WordPress Speed Improvement Snippets

WordPress out of the box is quite an efficient piece of software, however with recent developments it can be more bloated than it could be. Since going freelance, about 40% of my work has been improving the speed of WordPress for sites. Most of that has been removing bloat.

There are plenty of plugins out there that do a lot of work to improve speed. However I’ve a light, one file plugin that removes some of the standard functionality. This file includes the following:-

  • Switches off emoji support.
  • Removes the “generator” line in the head.
  • Removes oEmbeds.
  • Removes feed creation.

This plugin is installed on client sites, and is designed to be simple and lightweight, and do a few small jobs well.

<?php
/*
	Plugin Name: Dwi'n Rhys Speed Improvement Plugin
	Plugin URI: https://dwinrhys.com/
	Description: Plugin used to do a bunch of speed changes. Will be documented at a later point.
	Version: 0.1
	Author: Dwi'n Rhys
	Author URI: https://dwinrhys.com/
	License: GPL v3

	This program is free software: you can redistribute it and/or modify
	it under the terms of the GNU General Public License as published by
	the Free Software Foundation, either version 3 of the License, or
	(at your option) any later version.

	This program is distributed in the hope that it will be useful,
	but WITHOUT ANY WARRANTY; without even the implied warranty of
	MERCHANTABILITY or FITNESS FOR A PARTICULAR PURPOSE.  See the
	GNU General Public License for more details.

	You should have received a copy of the GNU General Public License
	along with this program.  If not, see <http://www.gnu.org/licenses/>.
*/

/**
 * Switch off emoji scripts from loading.
 *
 * To disable this, add define('DWINRHYS_ENABLE_EMOJIS', 1 ); to your wp-config.php file
 */
if ( ! defined( 'DWINRHYS_ENABLE_EMOJIS' ) ) {
	remove_action( 'wp_head', 'print_emoji_detection_script', 7 );
	remove_action( 'wp_print_styles', 'print_emoji_styles' );
}

/**
 * Remove the WP Generator
 * 
 * To disable this, add define('DWINRHYS_ENABLE_WPGENERATOR', 1 ); to your wp-config.php file
 */
if ( ! defined( 'DWINRHYS_ENABLE_WPGENERATOR' ) ) {
	remove_action( 'wp_head', 'wp_generator' );
}

/**
 * Switch off embeds from loading.
 * 
 * To disable this, add define('DWINRHYS_ENABLE_EMBEDS', 1 ); to your wp-config.php file
 */
if ( ! defined( 'DWINRHYS_ENABLE_EMBEDS' ) ) {
	add_action( 'wp_footer', 'dwinrhys_dequeue_embeds' );
}

/**
 * Switch off RSS Feeds
 * 
 * To disable this, add define('DWINRHYS_ENABLE_FEEDS', 1 ); to your wp-config.php file
 */
if ( ! defined( 'DWINRHYS_ENABLE_FEEDS' ) ) {
	remove_action( 'wp_head', 'feed_links', 2 );
	remove_action( 'wp_head', 'feed_links_extra', 3 );
}

/**
 * Function to disable embeds
 *
 * @return void
 */
function dwinrhys_dequeue_embeds() {
	wp_dequeue_script( 'wp-embed' );
}

Re-enabling Certain Features

Now, not every site will need these features disabling, and especially with clients you may want to leave a few of these features on. To do so, you can add the following lines to your wp-config.php file.

define('DWINRHYS_ENABLE_EMOJIS', 1 ); // Enable Emojis
define('DWINRHYS_ENABLE_WPGENERATOR', 1 ); // Enable Generator Line
define('DWINRHYS_ENABLE_EMBEDS', 1 ); // Enable Embeds
define('DWINRHYS_ENABLE_FEEDS', 1 ); // Enable Feeds.
8

Add custom meta column in the Users list

This is a very simple way to add a custom column to display in your user’s list. Say you want to show some preference that’s been added to the user’s profile with add_user_meta

First of all, let’s register the extra column

/**
 * The function hooked to the filter hook manage_users_columns that simply
 * adds a new column by key and value to the existing core columns for the users list
 * 
 * @author  Elliott Richmond <me@elliottrichmond.co.uk>
 * @since 0.1.0
 * @param array   $columns    Existing columns array.
 * @return string $columns    The new columns array.
 * 
 */
function wpstx_custom_user_columns($columns) {
    $columns['select_role'] = 'Preference';
    return $columns;
}
add_filter('manage_users_columns', 'wpstx_custom_user_columns', 10, 1);

Next, we’ll add the data that you want to show when that row is rendered, if the column name is equal to the key we provided above in the manage_users_colums hook we’ll use get_user_meta to get the data we want to show by the users ID and return the value.

/**
 * The function hooked to the filter hook manage_users_custom_column that displays
 * the information we want to see by the in individual user by ID or row listed
 * 
 * @author  Elliott Richmond <me@elliottrichmond.co.uk>
 * @since 0.1.0
 * @param string   $val    		   Existing columns array.
 * @param string   $column_name    The key value of the column that we will switch to set in our function 'wpstx_custom_user_columns'.
 * @param int      $user_id    	   The users ID used to identify the row the list is going to output.
 * 
 * @return string  $val    		   The existing or new string we want to display in the users list.
 * 
 */
function wpstx_custom_user_row( $val, $column_name, $user_id ) {
    switch ($column_name) {
		case 'select_role' :
			$meta_key = get_user_meta($user_id, 'select_role', true);
			$val = wpstx_select_role_output($meta_key);
			return $val;
        default:
    }
    return $val;
}
add_filter( 'manage_users_custom_column', 'wpstx_custom_user_row', 10, 3 );

You’ll notice I’m also using a function on the meta value, this is just a simple helper function to change the output by the key saved in the user’s meta, rather than use my function you could simply return $meta_key instead.

/**
 * This is an extra function to change a lowercase meta key
 * from the standard WordPress way of storing keys and changing
 * them to our prefered value as defined by the key value
 * 
 * @author  Elliott Richmond <me@elliottrichmond.co.uk>
 * @since 0.1.0
 * @param string  $meta_key    The incoming meta key.
 * @return string $preference  The output text.
 * 
 */
function wpstx_select_role_output($meta_key) {
	// die early if empty
	if ($meta_key == '') {
		return;
	}
	$output = array(
		'subscriber' => 'Recieve snippets',
		'contributor' => 'Submit snippets',
	);
	$preference = $output[$meta_key];
	return $preference;
}

@source https://github.com/eirichmond/wpstx-user-columns.git

9

Create a specific menu for logged in users

Here’s a way to add a specific menu for logged in users, this is useful if you’re building a membership site, where users need to login first but no longer need to see the login link after login and the menu can then be replaced with a users Account, Settings or Preferences menu.

So, first of all, we will need 2 menu locations.

One for logged out users to login, and one for users after they have logged in.

// Register Navigation Menus
function wpstx_logged_in_user_menu() {

	$locations = array(
		'logged-in-menu' => __( 'User Menu', 'wpstx_logged_in_user_menu' ),
		'logged-out-menu' => __( 'Login', 'wpstx_logged_in_user_menu' ),
	);
	register_nav_menus( $locations );

}
add_action( 'init', 'wpstx_logged_in_user_menu' );

Next, we need to create an action hook that renders the menu conditionally depending if the user is logged in or not. Here we will use PHP Ternary operator logic on the built-in WordPress function is_user_logged_in() to render the one menu or the other.

// Function with a conditional for logged in/out users
function wpstx_users_menu() {
    wp_nav_menu(
        array(
            'theme_location' => is_user_logged_in() ? 'logged-in-menu' : 'logged-out-menu'
        )
    );
}
// create an action hook for uses in your theme
// to render the menu simply add "do_action('wpstx_users_menu');" anywhere in your theme
add_action('wpstx_users_menu','wpstx_users_menu');

This action hook can then be used in your theme’s header/footer or wherever you want to put it to conditionally render the function...

// add this to one of your template files
do_action('wpstx_users_menu');

With this snippet running all you need to do now is go to:
Dashboard > Appearance > Menus
to create a couple of menus and allocate them to the relevant menu locations.

Create a menu for non-logged in users
Create a menu for logged in users
How the menu looks to users who are not logged in
How the menu looks to users who are logged in

@source https://github.com/eirichmond/wpstx-specific-menu-for-loggedin-users

10

Using cURL to Determine the Status Code of a URL

Whenever we’re working with remote requests within WordPress, we’re likely using one of the functions that are available through the core API. These are functions such as:

And they’re great and I recommend using them.

Depending on the project, you may need to determine the HTTP status of the page before making the request. And if you want to do that, I recommend two things:

  1. HTTP Status Codes
  2. The code below.

For example, the following code determines the status code of a URL using cURL:

<?php
/**
 * Determines if a specific URL returns a valid page. This is experimental and it is based on
 * the status code.
 *
 * @param string $url the url to evaluate
 *
 * @return bool true if the URL returns a status code of 404; otherwise, false
 */
public function isValidUrl(string $url): bool
{
	$curl = curl_init($url);
	curl_setopt($curl, CURLOPT_URL, $url);
	curl_setopt($curl, CURLOPT_RETURNTRANSFER, true);
	$response = curl_exec($curl);
  
	$httpCode = curl_getinfo($curl, CURLINFO_HTTP_CODE);
  	curl_close($curl);
  
  	return (404 !== $httpCode);
}

@source: https://gist.github.com/tommcfarlin/2ad96af9aa3007807686ac87b630dcd7#file-00-is-valid-url-php

Of course, you can replace 404 with any value from the above page to evaluate it to any given status you need.

Regardless, before making a request to a given URL, this particular function can help you determine the course of action you need to take in your project before actually making a request and have it fail.

11

Shortcode for Copyright, Credit and Login Access Sitewide

Once a site is launched, one of the most fundamental tools a client needs is easy access to login and logout of the site. Telling them where the WP login page is located is not something they will typically remember. It’s become quite a lifesaver to put a small footer link on every page that allows them to login, logout, or get back to the dashboard. Also, its a great place to provide attribution back to the site designer, if that’s something you want to do. Couple that with an automatically updating copyright statement and we have a very useful footer snippet!

Use this handy shortcode to display a short line or two of text at the bottom of every page showing your site’s copyright (automatically updated to this year) and a simple login/logout link. It also optionally will provide credit for the site’s designer.

Here’s an Example

Logged out View of Shortcode
Logged In View of Shortcode

Using the Shortcode

  1. Copy the following into your functions.php file.
  2. Update the default settings to be your own site designer information.
  3. Then place the shortcode [credits] into the footer of your site.
// Copyright/Credit/Access Shortcode
// Usage: [credits oscredit="false" title="" link="" link_title="" linebreak="true"]
// All parameters optional. Defaults set below.

add_shortcode('credits', 'opensky_credits_function');
function opensky_credits_function( $atts, $content = null ) {
   extract( shortcode_atts( array(
      'oscredit' => 'true', //set true|false to show or hide designer's credit
      'title' => 'Open Sky Web Studio', // designer's name
      'link' => 'https://www.openskywebstudio.com', // link to designer's website
      'link_title' => 'Open Sky Web Studio | Clean, Effective Websites', // designer's link title for seo
      'linebreak' => 'true', // true|false to display on one line or two
      ), $atts ) );

 $creds = "<span id='credits'>Copyright © " . date('Y') . " <a href='".get_option('home')."' title='".get_bloginfo('name')." | ".get_bloginfo('description')."'>".get_bloginfo('name')."</a>. All Rights Reserved. ";
 
 if (strtolower($oscredit) == "false")
 $creds .= "<!--";

 if (strtolower($linebreak) == "true")
 $creds .= "<br/>";
 
 $creds .= "Site Design • <a href='".$link."' title='".$link_title."' target='_blank'>".$title."</a> • ";

 if (strtolower($oscredit) == "false")
 $creds .= "-->";
 $creds .= wp_loginout('', false) . wp_register(' • ', '', false) . '</span>';

 return $creds;
}
12

Loading React in a WordPress Theme

Now that WordPress ships with React, it is important to know how to properly enqueue it your themes.

The overall process includes the following:

  1. List wp-element as a dependency for your own React code
  2. Setup a build tool (I recommend WP Scripts)
  3. Setup a custom page template where your React code will load
  4. Write your React code

You can check out the final source code here if you want to jump ahead.

Make React a Dependency

When you enqueue your own JavaScript you can simply include wp-element as a dependency and all of the functions from React and ReactDOM will be loaded on the page in a global window object named wp.element.

Here is some example code you could add to your functions.php file:

add_action( 'wp_enqueue_scripts', 'my_theme_enqueue_styles' );
function my_theme_enqueue_styles() {
 
    wp_enqueue_script(
        'my-theme-frontend',
        get_stylesheet_directory_uri() . '/build/index.js',
        ['wp-element'],
        time(), //For production use wp_get_theme()->get('Version')        
        true
    );
  
}

This is all you need to do!

If your JavaScript file is located somewhere else you will want to change /build/index.js, however, this will work with the default settings for WP Scripts.

Setup Your Build Tool (WP Scripts)

WP Scripts is a command line toolkit from the WordPress team that will bundle your JavaScript code. It includes webpack as well as some other tools and makes them all work with very little configuration.

To start, create a package.json file in the root folder of your theme and add the following:

{
  "name": "theme-name",
  "version": "1.0.0",
  "description": "A demo theme with React",
  "main": "index.js",
  "devDependencies": {
    "@wordpress/scripts": "^5.1.0"
  },
  "scripts": {
    "build": "wp-scripts build",
    "check-engines": "wp-scripts check-engines",
    "check-licenses": "wp-scripts check-licenses",
    "lint:css": "wp-scripts lint-style",
    "lint:js": "wp-scripts lint-js",
    "lint:pkg-json": "wp-scripts lint-pkg-json",
    "start": "wp-scripts start",
    "test:e2e": "wp-scripts test-e2e",
    "test:unit": "wp-scripts test-unit-js"
  },
  "author": "Zac Gordon",
  "license": "ISC"
}

Then run npm install. This will get everything setup and installed for you.

Now, you can create your main JavaScript/React file at /src/index.js and WP Scripts will automatically bundle everything and save it to /build/index.js.

You can change the entry and output paths for the webpack configuration, but it is easiest to just use the defaults.

Create a Custom Page Template

For this demo we will create a simple custom page template inside a Twenty Twenty Child Theme that you can find the full code for here.

<?php
/**
 * Template Name: React Template
 */
get_header();
?>

<main id="site-content" role="main">
	<article class="post-2 page type-page status-publish hentry">
		<?php get_template_part( 'template-parts/entry-header' ); ?>
		<div class="post-inner thin">
			<div class="entry-content">				

				<div id="react-app"></div><!-- #react-app -->

			</div><!-- .entry-content -->
		</div><!-- .post-inner -->
	</article><!-- .post -->
</main><!-- #site-content -->

<?php get_template_part( 'template-parts/footer-menus-widgets' ); ?>
<?php get_footer(); ?>

The important thing is that we have a custom div with an id of react-app. This is where we will load our custom React code.

You could also have your React code added to a header, footer, widget area or pretty much anywhere on a WordPress site you need it.

Write Your React Code

Now we can create our /src/index.js file and add some React code.

Here is some basic code to create a <Vote /> component that let’s people click a button to increase the count of votes. It is not very practical and the data does not get saved or connected to WordPress, but it does demonstrate how to write React in your WordPress Theme.

const { render, useState } = wp.element;

const Votes = () => {
  const [votes, setVotes] = useState(0);
  const addVote = () => {
    setVotes(votes + 1);
  };
  return (
    <div>
      <h2>{votes} Votes</h2>
      <p>
        <button onClick={addVote}>Vote!</button>
      </p>
    </div>
  );
};
render(<Votes />, document.getElementById(`react-app`));

The code above will display a button that increases the votes on click. You can customize this as needed as well as begin creating and importing in other files and components as you would expect with a React app.

Happy Reacting!

React will become more commonplace in WordPress themes and plugins so hopefully this article helps you get more comfortable loading and using React in your projects.

13

Auto-Redirect Root-Level Posts on Permalink Change

The use case here is when you’ve made the decision to switch your blog post URLs from being at the root-level (e.g. /hello-world) to using a base path (e.g. /blog/hello-world).

Typically, you’d have to carefully map out the redirects and set them up in your .htaccess file, a WordPress plugin, or in your web host’s redirect manager. Creating a generic regex solution won’t work since pages also are at the root-level.

Here is some drop-in code that will automatically detect 404’s and will redirect these root-level posts to the new URL:

<?php
add_action( 'template_redirect', function () {
	/**
	 * @var WP $wp
	 */
	global $wp;
	/**
	 * @var WP_Query $wp_query
	 */
	global $wp_query;
	
	if ( $wp_query->is_404() ) {
		$query = new WP_Query( array(
			'post_type'      => 'post',
			'post_status'    => 'publish',
			'name'           => $wp->request,
			'posts_per_page' => 1,
			'nopaging'       => true,
			'no_found_rows'  => true,
		) );
		if ( $query->found_posts ) {
			$redirect_url = add_query_arg( $wp->query_string, '', get_the_permalink( $query->post ) );
			wp_safe_redirect( $redirect_url, 301 );
		}
	}
} );
14

Remove Gutenberg block editor’s tips

Are you tired of Gutenberg’s tips?

Do you want to get rid of it once and for all users automatically?

Here is a simple PHP snippet to automatically remove them for all users.

function advent_remove_gutenberg_tips() {
	$script = "
jQuery(document).ready(function(){
    var is_tip_visible = wp.data.select( 'core/nux' ).areTipsEnabled()
    if (is_tip_visible) {
        wp.data.dispatch( 'core/nux' ).disableTips();
    }
});	
	";
	wp_add_inline_script( 'wp-blocks', $script );
}
add_action( 'enqueue_block_editor_assets', 'advent_remove_gutenberg_tips' );

Of course, you can also go to editor’s options and uncheck “Tips” checkbox.

But since these settings are saved on the user’s browser using LocalStorage, the tips will come back every time you’ll use a different device to access the editor.

It’s also necessary to do that individually for each administrator of the website.

15

Load different styles depending on the screen using the Strategy Pattern

function fofo_chrimbo_snippet() {

	if( function_exists( 'get_current_screen' ) ) {

		$current_screen = get_current_screen();

		/*

		Instead of using a switch (or if-else tree) to do something
		different depending on a specific value
		
		switch( $current_screen->id ) {

			case 'edit-post';
				$theme_style_slug = 'theme-style-slug-1';
				$theme_css_url = '/1/2/3';
				break;
			case 'post';
				$theme_style_slug = 'theme-style-slug-2';
				$theme_css_url = '/21/22/23';
				break;
			case 'edit-category';
				$theme_style_slug = 'theme-style-slug-3';
				$theme_css_url = '/31/32/33';
				break;
			case 'edit-post_tag';
				$theme_style_slug = 'theme-style-slug-4';
				$theme_css_url = '/41/42/43';
				break;
			case 'edit-page';
				$theme_style_slug = 'theme-style-slug-5';
				$theme_css_url = '/51/52/53';
				break;
			case 'page';
				$theme_style_slug = 'theme-style-slug-6';
				$theme_css_url = '/61/62/63';
				break;
		}

		wp_enqueue_style( $theme_style_slug, $theme_css_url );

		*/

		/* Use the strategy pattern and anonymous functions instead */

		$style_list_registry = [];
		$style_list_registry[ 'edit-post' ] = function() { wp_enqueue_style( 'theme-style-slug-1', '/1/2/3' ); };
		$style_list_registry[ 'post' ] = function() { wp_enqueue_style( 'theme-style-slug-2', '/21/22/23' ); };
		$style_list_registry[ 'edit-category' ] = function() { wp_enqueue_style( 'theme-style-slug-3', '/31/32/33' ); };
		$style_list_registry[ 'edit-post_tag' ] = function() { wp_enqueue_style( 'theme-style-slug-4', '/41/42/43' ); };
		$style_list_registry[ 'edit-page' ] = function() { wp_enqueue_style( 'theme-style-slug-5', '/51/52/53' ); };
		$style_list_registry[ 'page' ] = function() { wp_enqueue_style( 'theme-style-slug-6', '/61/62/63' ); };

		$style_list_registry[ $current_screen->id ]();

	}
}

add_action("admin_enqueue_scripts", "fofo_chrimbo_snippet");


16

How to add metaboxes to your plugin settings page

A handy snippet for plugin developers…

<?php
/**
 * Plugin Name: Metaboxes on Plugin Setings Pages
 * Description: How to add metaboxes to your plugin settings page
 * Version:     1.0
 * Author:      malCure
 * Author URI:  https://malcure.com/
 * Text Domain: malcure
 * License:     MIT
 * License URI: https://opensource.org/licenses/MIT
 * Plugin URI:  https://malcure.com/
 */

if ( ! defined( 'ABSPATH' ) ) {
	exit; // Exit if accessed directly
}

final class my_metaboxes_init {
	static function get_instance() {
		static $instance = null;
		if ( is_null( $instance ) ) {
			$instance = new self();
			$instance->init();
		}
			return $instance;
	}

	private function __construct() {
	}

	function init() {
		add_action( 'admin_menu', array( $this, 'settings_menu' ) );
		add_action( 'load-toplevel_page_malcure', array( $this, 'load_meta_boxes' ) );
		add_action( 'load-toplevel_page_malcure', array( $this, 'add_meta_boxes' ) );
		add_action( 'load-toplevel_page_malcure', array( $this, 'add_admin_scripts' ) );
	}

	function settings_menu() {
		add_menu_page( 'My Plugin Settings', 'My Plugin Settings', 'manage_options', 'malcure', array( $this, 'settings_page' ), 'dashicons-chart-pie', 79 );
	}

	function load_meta_boxes() {
		add_action( 'add_meta_boxes', array( $this, 'my_plugin_metaboxes' ) );
	}

	function add_meta_boxes() {
		do_action( 'add_meta_boxes', 'toplevel_page_malcure', '' );
	}

	function add_admin_scripts() {
		wp_enqueue_script( 'jquery' );
		wp_enqueue_script( 'common' );
		wp_enqueue_script( 'wp-lists' );
		wp_enqueue_script( 'postbox' );
	}

	function settings_page() {
		?>
		<div class="wrap">
		<h1 id="page_title">My Settings Page Heading</h1>
			<div id="poststuff">
				<div class="metabox-holder columns-2" id="post-body">
					<div class="postbox-container" id="post-body-content">
						<?php do_meta_boxes( 'toplevel_page_malcure', 'main', null ); ?>
					</div>
					<!-- #postbox-container -->
					<div id="postbox-container-1" class="postbox-container">
						<?php
								do_meta_boxes( 'toplevel_page_malcure', 'side', null );
						?>
					</div>
				</div>
			</div>
		</div>
		<script type="text/javascript">
		//<![CDATA[
		jQuery(document).ready(function($) {
			// close postboxes that should be closed
			$('.if-js-closed').removeClass('if-js-closed').addClass('closed');
			// postboxes setup
			postboxes.add_postbox_toggles('toplevel_page_malcure');
		});
		//]]>
		</script>
		<?php
	}

	function my_plugin_metaboxes() {
		add_meta_box( 'my_first_metabox', 'My First Metabox', array( $this, 'my_first_metabox_html' ), 'toplevel_page_malcure', 'main', 'high' );
		add_meta_box( 'my_second_metabox', 'My Second Metabox', array( $this, 'my_second_metabox_html' ), 'toplevel_page_malcure', 'side', 'high' );
	}

	function my_first_metabox_html() {
		?>
		Howdy! I'm your first custom metabox. Now with some WordPress and PHP magic you can customize me as you like.
		<?php
	}

	function my_second_metabox_html() {
		?>
		Meanwhile, I'll sit in the side. I'm your second custom metabox.
		<?php
	}

}


function my_metaboxes_init() {
	return my_metaboxes_init::get_instance();
}

my_metaboxes_init();

17

Creating Plugin Settings Page without dealing with Official Settings API

This is what we are going to create:

TLDR;

Download the sample plugin, install it to see it in action or simply explore the code. Pass a config array to the helper class constructor and Boom! your plugin options page with auto-sanitized input is ready to rock.

What is it?

Its a helper class that you may require in your plugin and create plugin Settings page by just passing configuration array.

Why should i use it?

  • Create plugin options page without the pain of dealing with Settings API
  • One config array to create everything: admin menu, settings page, sections, fields.
  • Fields input is auto sanitized
  • Can be used to make Tabs or Tab-less Settings page
  • Can be used to add plugin action links
  • Ability to override sanitization callback
  • Ability to override fields display callback

How to use?

Complete Details can be found in the Wiki, in the nutshell, follow the steps:

  1. copy the class in plugin vendor folder and require the class in your plugin files (add dependency)
  2. hook into admin_menu and provide a callback function
  3. in the callback function, pass the config array to this helper class object to build your sections and fields.

Its that easy. Here is a simple example code that will create a plugin menu, 2 sections and some fields under these sections.

Available Field Types:

Following Field Types can be added using this Helper Class:

  • text
  • url
  • number
  • color
  • textarea
  • radio
  • select
  • checkbox
  • multicheck
  • media
  • file
  • posts (WP posts and Custom Post Types)
  • pages (WP pages)
  • password
  • html

Step-by-Step: Creating Setting Page

1. Create admin_menu hook:

function plugin_menu_using_boo_setting_helper_simple() {
	// Our Code goes here
}

add_action( 'admin_menu', 'plugin_menu_using_boo_setting_helper_simple' );

2. Require helper class

Next step is to require our helper class.

function plugin_menu_using_boo_setting_helper_simple() {
	// Require Settings Helper Class
	require_once 'vendor/boospot/boo-settings-helper/class-boo-settings-helper.php';

}

3. Configuration Array

configuration array is the main array that shall be passed to the helper class. Complete configuration details can be found on Settings Configuration Array Wiki Page. It mainly has following 6 components.

$config_array = array(
	'prefix'   => 'plugin_prefix_',   // string to prefix with options id (optional)
	'tabs'     => true,     // true | false  (optional)  ( Default: true )
	'menu'     => array(),  // array of menu configuration
	'sections' => array(),  // array of arrays configuring sections
	'fields'   => array(),  // array of arrays configuring fields. array key same as sections  
	'links'    => array()   // configuration array for links (optional)
);

Lets start building these components

3.1. Prefix options ids

We should always prefix anything that goes in global namespace, so we can define our prefix once and it shall be added to all fields automatically

function plugin_menu_using_boo_setting_helper_simple() {
	// Require Settings Helper Class
	require_once 'vendor/boospot/boo-settings-helper/class-boo-settings-helper.php';
	// Create Config Array
	$config_array             = array();
	$config_array['prefix']   = 'plugin_prefix_';

}

4. Plugin Menu

We can create plugin menu using the menu array property. Complete configuration options for different fields can be found on Menu Configuration Wiki Page.

function plugin_menu_using_boo_setting_helper_simple() {
	// ...
	// ...
	$config_array             = array();
	$config_array['prefix']   = 'plugin_prefix_';
	$config_array['menu']     = array(
		'page_title' => __( 'Plugin Name Settings', 'plugin-name' ),
		'menu_title' => __( 'Plugin Name', 'plugin-name' ),
		'capability' => 'manage_options',
		'slug'       => 'plugin-name',
		'icon'       => 'dashicons-performance',
	);

}

5. Section for Options pages

Lets create some sections to group our options. The following will create two sections, general and advance. Notice the id for sections. This shall be used to assign fields to specific sections later-on.

function plugin_menu_using_boo_setting_helper_simple() {
	// ...
	// ...
	$config_array['sections'] = array(
		array(
			'id'    => 'general_section',
			'title' => __( 'General Settings', 'plugin-name' ),
			'desc'  => __( 'These are general settings for Plugin Name', 'plugin-name' ),
		),
		array(
			'id'    => 'advance_section',
			'title' => __( 'Advanced Settings', 'plugin-name' ),
			'desc'  => __( 'These are advance settings for Plugin Name', 'plugin-name' )
		)
	);
}

6. Configure Fields for sections

The following configuration shall create two fields, one for each section. Complete configuration options for different fields can be found on Fields Configuration Wiki Page. Array key defines the section_id where the field is to displayed

function plugin_menu_using_boo_setting_helper_simple() {
	// ...
	// ...
	$config_array['fields']   = array(
		'general_section' => array(
			array(
				'id'                => 'text_field_id_1',
				'label'             => __( 'First Text', 'plugin-name' ),
				'desc'              => __( 'Simple Description', 'plugin-name' ),
				'placeholder'       => __( 'Text Input placeholder', 'plugin-name' ),
				'type'              => 'text',
			)
		),
		'advance_section' => array(
			array(
				'id'                => 'text_field_id_2',
				'label'             => __( 'Another Text Field', 'plugin-name' ),
				'placeholder'       => __( 'Text Input placeholder', 'plugin-name' ),
				'type'              => 'text',
			)
		)
	);
}

7. Pass $config_array to helper class

Now, we can pass this config array to helper class. and Voila , Your settings page is ready to rock.

function plugin_menu_using_boo_setting_helper_simple() {
	// Require Settings Helper Class
	require_once 'vendor/boospot/boo-settings-helper/class-boo-settings-helper.php';
	// Create Config Array
	$config_array             = array();

	// ...
	// ...
	// ...

	// Pass Config Array to Class Constructor
	$settings_helper = new Boo_Settings_Helper( $config_array );
}

8. Create Plugin Links

You may also create plugin action links by passing the array param link. Details of link config is on the Wiki Page.

function plugin_menu_using_boo_setting_helper_simple() {
	$config_array             = array();
	// ...
	// ...
	// ...
	$config_array['links']    = array(
		'plugin_basename' => plugin_basename( __FILE__ ),
		'action_links'    => array(
			array(
				'type' => 'default',
				'text' => __( 'Configure', 'plugin-name' ),
			),
			array(
				'type' => 'internal',
				'text' => __( 'Gravity Forms', 'plugin-name' ),
				'url'  => 'admin.php?page=gf_edit_forms',
			),
			array(
				'type' => 'external',
				'text' => __( 'Github Repo', 'plugin-name' ),
				'url'  => 'https://github.com/boospot/boo-settings-helper',
			),
		),
	);

	// Pass Config Array to Class Constructor
	$settings_helper = new Boo_Settings_Helper( $config_array );
}

Full Code to create all field types

You may check the Detailed Example to create the settings page with all field types.

Final Thoughts

Using this class has helped me a lot while creating custom plugins for my own sites and clients. For me the benefit of not having to deal with official Settings API is a huge plus 🙂

18

Add cURL version to Site Health Checker

This snippet shows you how you can easily extend the “tests” within the Site Health testing area. The cURL version is really important for secure communications with third-party sites like payment gateways, and it is part of what makes your https connections strong and secure.

/**
  * Adds a cURL version test to Site Health
  *
  * Info here: https://make.wordpress.org/core/2019/04/25/site-health-check-in-5-2/
  * NOTE: Requires version 5.2+ of WordPress 
  *
 **/
function register_give_curl_tester( $tests ) {
    $tests['direct']['curl_tester'] = array(
        'label' => __( 'Test cURL' ),
        'test'  => 'give_test_curl_version',
    );
    return $tests;
}
add_filter( 'site_status_tests', 'register_give_curl_tester' );
function give_test_curl_version() {
    $results = array(
        'label'       => __( 'cURL Version' ),
        'status'      => 'good',
        'badge'       => array(
            'label' => __( 'Security' ),
            'color' => 'blue',
        ),
        'description' => sprintf(
            '<p>' .  __( 'Your cURL version is: ', 'give' ) . '%g -- this meets or exceeds the minimum requirement for secure online donations.</p>', curl_version()['version']),
        'actions'     => '',
        'test'        => 'curl_tester',
    );
    $curl_version = curl_version()['version'];
    if ( $curl_version < '7.40' ) {
        $results['status'] = 'critical';
        $results['label'] = __( 'cURL version is outdated' );
        $results['description'] = sprintf(
            '<p>' .  __( 'Your cURL version is: ', 'give' ) . '%g</p>', curl_version()['version']);
        $results['actions'] = sprintf(
            '<p>%s</p>',
            __( 'Your cURL version is outdated. This can negatively impact your online donations with GiveWP. Please contact your host about getting cURL updated to at least version 7.40.', 'give' )
        );
        $results['badge']['color'] = 'red';
    }
    return $results;
}
19

How to remove billing address fields from WooCommerce checkout form if there are only virtual products in the cart [WooCommerce Code Snippet]

WooCommerce allows you to sell physical as well as digital / virtual / downloadable products. In case of physical products, we need to collect billing and shipping address because goods need to be delivered to the customers. However in case of digital products, we don’t need to deliver goods and so it does not make sense to collect billing address.

This is actually one of the features my client wanted who has an online store where she sells hard cover books as well as digital copies. For smooth checkout process she requested a feature where users ordering digital copies only should not go through the hassle of filling billing address details.

Here’s the code snippet for the same:

add_filter('woocommerce_checkout_fields','wooc_custom_checkout_fields');

function wooc_custom_checkout_fields( $fields ) {
	if( wooc_cart_has_virtual_product() == true ) { //helper function to check if there are only virtual products in the cart
		unset($fields['billing']['billing_first_name']);
		unset($fields['billing']['billing_last_name']);
		unset($fields['billing']['billing_company']);
		unset($fields['billing']['billing_address_1']);
		unset($fields['billing']['billing_address_2']);
		unset($fields['billing']['billing_city']);
		unset($fields['billing']['billing_postcode']);
		unset($fields['billing']['billing_country']);
		unset($fields['billing']['billing_state']);
		unset($fields['billing']['billing_phone']);
	}
	return $fields;
}


function wooc_cart_has_virtual_product() {
	global $woocommerce;
	
	// By default, no virtual product
	$has_virtual_products = false;
	
	// Default virtual products number
	$virtual_products = 0;
	
	// Get all products in cart
	$products = $woocommerce->cart->get_cart();
	
	// Loop through cart products
	foreach( $products as $product ) {
		// Get product ID and '_virtual' post meta
		$product_id = $product['product_id'];
		$is_virtual = get_post_meta( $product_id, '_virtual', true );
		// Update $has_virtual_product if product is virtual
		if( $is_virtual == 'yes' ) {
			$virtual_products += 1;
		}
	}
	if( count($products) == $virtual_products ) { //match the count with the products in the cart
		$has_virtual_products = true;
		}
	return $has_virtual_products;
}
20

Internal REST API Calls

The WordPress REST API is great, but sometimes we want to load an initial data set to bootstrap a JS application from the API via PHP.

Here is how you can make an API request in PHP without HTTP:

<?php

$request = new WP_REST_Request( 'GET', $route );
$request->set_query_params( $params );
$response = rest_do_request( $request );
$data = rest_get_server()->response_to_data( $response, false );

More details: https://wpscholar.com/blog/internal-wp-rest-api-calls/

21

Gutenberg colour palette by className

I have run into an issue with the Gutenberg color palette because it always returns the HEX value of the selected color. What I wanted were options to select a color value in the admin, but have a css class string on the frontend with my selection.

Here is a simple React component that does just that. It selects and displays the colors in the admin the same way that native color palette does, but for the frontend, it outputs the provided string as an attribute.

Put this component inside your codebase, but make sure that you have all the imports provided using node_modules.

import { find } from 'lodash';
import { useState } from 'react';
import { getColorObjectByColorValue } from '@wordpress/editor';
import { ColorPalette } from '@wordpress/components';

export function ColorPaletteCustom({
  colors,
  value,
  onChange,
  disableCustomColors = true,
  clearable = false,
  label,
  help,
}) {
  const [color, setColor] = useState(value);

  const colorValue = find(colors, { name: color });

  return (
    <div className="components-base-control">
      {label && <label htmlFor="color-pallete" className="components-base-control__label">{label}</label>}
      <br />
      <ColorPalette
        colors={colors}
        disableCustomColors={disableCustomColors}
        value={typeof colorValue === 'undefined' ? color : colorValue.color}
        onChange={(newColor) => {
          const colorObject = getColorObjectByColorValue(colors, newColor);
          
          setColor(() => newColor);
          onChange(typeof colorObject === 'undefined' ? '' : colorObject.name);
        }}
        clearable={clearable}
      />
      {help && (
        <p className="components-base-control__help">{help}</p>
      )}
    </div>
  );
}

Next, go to your block and import this component inside the InspectorControls component.

 <ColorPaletteCustom
  label={'Color'}
  colors={[
    { name: 'red', color: '#D8262C' },
    { name: 'pink', color: '#F2BCC0' },
    { name: 'black', color: '#000000' },
  ]}
  value={styleColor}
  onChange={
    (event) => props.setAttributes({ styleColor: event })
  }
/>

This component supports all the props that you can use on the Gutenberg color palette the same way, so for detailed documentation, check this link.

22

wp cli workflow and installation script

Here’s a small shell script that I use to install WordPress locally, you will need to install wp-cli

Once you have wp-cli install simply save this script in to a file named ‘install.sh’ and ensure it lives in the folder you want to install WordPress then from the command line ‘cd’ into the folder where it lives and run ‘sh install.sh’ and follow the prompts in your terminal.

#!/bin/sh
# download the core
wp core download --locale=en_GB

# setup the wp-config
read -p "DB Name?: " -e DBNAME
read -p "DB Prefix?: " -e DBPREFIX

# to create the wp-config file with parameters set above
# Note the dbuser and dbpass are set here for a local development setup
wp config create --dbname=$DBNAME --dbuser=root --dbpass="" --dbprefix=$DBPREFIX --extra-php <<PHP
define( 'WP_DEBUG', true );
define( 'DISALLOW_FILE_EDIT', true);
PHP
# --extra-php is just some standard stuff I like to set up with every install

# creates the db using the parameters set above
wp db create

read -p "URL?: " -e URL
read -p "Title?: " -e TITLE
read -p "Admin email?: " -e ADEMAIL
read -p "Admin username?: " -e ADUSERNAME
read -p "Admin password?: " -e ADPASSWORD

# installs WordPress using the parameters set above
wp core install --url=$URL --title="$TITLE" --admin_email=$ADEMAIL --admin_user=$ADUSERNAME --admin_password=$ADPASSWORD

# this is just something else I like to setup with every install, saves me having to manually set it
# here you can add other options you find yourself setting everytime you install WordPress
wp option update permalink_structure '/%postname%/'

This might not run on your local machine but it works in my Mac OS environment and you may need to adapt it to work on your setup.

23

Allow Cross-Origin API Requests

Web browsers do not allow websites to make cross-origin requests (requests from one domain to another) unless the target website explicitly allows these types of requests.

As a result, if you intend for the REST API on your WordPress site to be publicly available for others to use, you will need to allow cross-origin requests. You can be explicit and only allow requests from a specific domain, or you can allow requests from any domain.

This is how you’d allow it for any external domain:

<?php

add_action( 'rest_api_init', function() {
   
	remove_filter( 'rest_pre_serve_request', 'rest_send_cors_headers' );
  
	add_filter( 'rest_pre_serve_request', function( $value ) {
		header( 'Access-Control-Allow-Origin: *' );
		header( 'Access-Control-Allow-Methods: POST, GET, OPTIONS, PUT, DELETE' );
		header( 'Access-Control-Allow-Credentials: true' );

		return $value;
		
	});
  
}, 12 );

To make this specific to a particular domain, just replace the * with the domain.

24